Mandriva 2010 Spring was released July 8, 2010. It comes with kernel 2.6.33 (2.6.33.5-desktop586-2mnb), KDE 4.4.3 and Firefox 3.6.6. It actually comes with tons of applications.
Its a pretty good distribution, I particular like the functionality where it removes any unnecessary packages during the installation. I haven't seen this in Ubuntu, Fedora, Debian, PCLinuxOS, Mint, OpenSUSE nor CentOS.
What follows is a series of screen captures installing this distribution.
Figure 1. Boot menu
Figure 2. Language, this will be the language that will be used by the system.
Figure 3. License agreement, of course click Accept to continue if you are happy with the agreement.
Figure 4. Timezone, this will be used to show correct local time.
Figure 5. Allows you to select the correct time, on some machines the BIOS can be set to localtime or UTC.
Figure 6. Select appropriate keyboard for your system.
Figure 7. Start of the Wizard for installing the rest of the system.
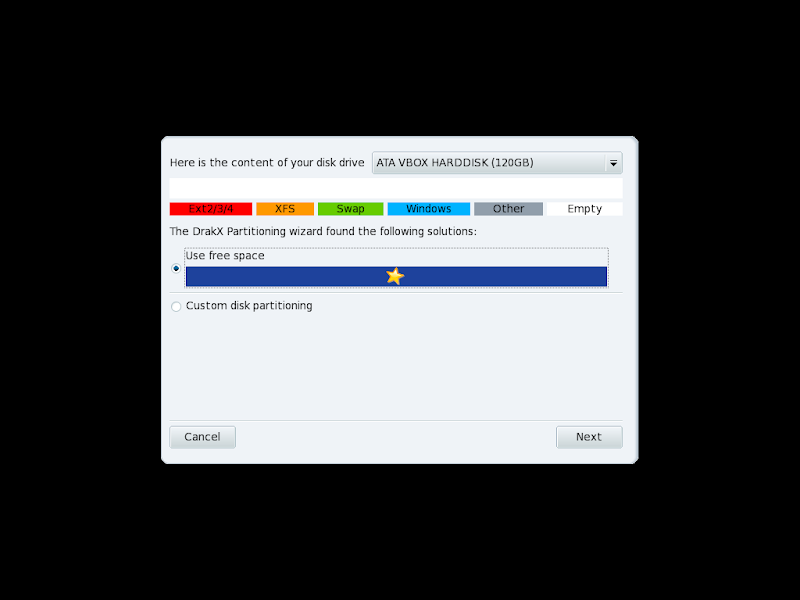
Figure 8. Partition layout, in my case I am installing this on VirtualBox guest machine so the default are just fine.
Figure 9. Remove unused packages, this is I believe a first in Mandriva, at least when I wrote this blog. I saw that it did try to remove unused drivers and packages that I will not be needing on this virtual machine.
Figure 10. Boot loader options, for multiboot machines like having Windows, Linux, Solaris in one machine, you may have to pay attention here otherwise the default will be fine.
Figure 11. Select the image that will be used to used to boot the machine, in a virtual machine environment default is fine.
Figure 12. Installation of Mandriva is now complete!!! Restart the system, next would be to configure the system.
Figure 13. See up root password and add a user. Root user is the superuser of the system.
Figure 14. Congratulations!!! you've now a working Mandriva system.
Figure 15. Register an account with Mandriva, this is optional but this is probably the least you can do to help the distribution.
Figure 16. Upload your hardware configuration to Mandriva, again would be nice to help this distribution by letting them know of the hardware profile that users have.
Figure 17. Installation is Done!!!
Figure 18. Logon screen
Figure 19. This is a capture of how it looks like, pretty looking desktop.
Enjoy!
~ts
Subscribe to:
Post Comments (Atom)
Fedora install screen chronicle
Fedora install screen chronicle Below are links to Fedora installation screens. It is interesting to see how it has evolved over time. Fed...
-
Installing MonoDevelop in OpenSUSE 12.2 from its repository was very easy. When running it for the first time though I got the message: Th...
-
Tried to update my Ubuntu host today and it did pickup that new version of VirtualBox is available (4.1.8). All other packages installed pro...
-
This is quick start guide how to run ssh server on QNX. Tested on QNX 6.5 (650SP1-VM.tar). # ssh-keygen -t dsa -b 1024 -f /etc/ssh/ssh...


No comments:
Post a Comment