#include <iostream>
#include <csignal>
#include <ctime>
#include <cerrno>
#include <cstring>
#include <unistd.h>
#include <sys/time.h>
#include <time.h>
#include <stdio.h>

void timer_handler(int signo) {
    struct timeval tv;
    gettimeofday(&tv, NULL);
    char buf[100];
    struct tm* nowtm;
    nowtm = localtime(&tv.tv_sec);
    strftime(buf, sizeof(buf), "%Y-%m-%d %H:%M:%S", nowtm);
    printf("Timer expired at %s.%03ld\n", buf, tv.tv_usec / 1000);
}

int main() {
    timer_t timerid;
    struct sigevent sev;
    struct itimerspec its;
    struct sigaction sa;

    // Install the timer handler
    sa.sa_flags = 0;
    sa.sa_handler = timer_handler;
    sigemptyset(&sa.sa_mask);
    if (sigaction(SIGRTMIN, &sa, NULL) == -1) {
        std::cerr << "sigaction: " << errno << std::endl;
        return -1;
    }

    // Create the timer
    sev.sigev_notify = SIGEV_SIGNAL;
    sev.sigev_signo = SIGRTMIN;
    if (timer_create(CLOCK_REALTIME, &sev, &timerid) == -1) {
        std::cerr << "timer_create: " << errno << std::endl;
        return -1;
    }

    // Set the timer to expire every second
    its.it_value.tv_sec = 1;
    its.it_value.tv_nsec = 0;
    its.it_interval.tv_sec = 1;
    its.it_interval.tv_nsec = 0;
    if (timer_settime(timerid, 0, &its, NULL) == -1) {
        std::cerr << "timer_settime: " << errno << std::endl;
        return -1;
    }

    // Main loop
    while (true) {
        pause(); // Wait for signals
    }

    return 0;
}
Wednesday, May 07, 2025
Installing QNX 6.5.1 on Ubuntu 24.04
Installing QNX 6.5.1 on Ubuntu 24.04
Install pre-requisites$: sudo dpkg --add-architecture i386 $: sudo apt update $: sudo apt install libc6:i386 default-jre-headless:i386 libgtk2.0-0:i386 libcanberra-gtk-module:i386 gtk2-engines-murrine:i386 libatk-adaptor:i386 gtk2-engines-pixbuf:i386 gtk2-engines:i386 libasound2-plugins:i386 libxtst6:i386
$: cd /media/$USER/QNXSDP650
$: sudo -E ./qnxsdp-6.5.0-201007091524-linux.bin -silent
$: qde
$: cd cd /media/$USER/qnxsdp-6.5.0SP1
$: sudo -E ./qnxsdp-6.5.0SP1-201206271006-linux.bin -silent
u1@m18:/media/u1/qnxsdp-6.5.0SP1$ qconfig
QNX Installations

  Installation Name: QNX Software Development Platform 6.5.0
            Version: 6.5.0
     Base Directory: /opt/qnx650
           QNX_HOST: /opt/qnx650/host/linux/x86
         QNX_TARGET: /opt/qnx650/target/qnx6

Additional Packages

	  Package Name: QNX Software Development Platform
	       Version: 6.5.0SP1
	          Base: QNX SDP 6.5.0
	  Installation Path: /opt/qnx650
Tuesday, April 29, 2025
Running QNX on emulated cortex-a15 using QEMU
Running QNX on emulated cortex-a15 using QEMU
General information:- Host (for running QEMU) OS: Ubuntu 24.04.2 LTS
- QEMU: QEMU emulator version 8.2.2 (Debian 1:8.2.2+ds-0ubuntu1.6)
- QNX 6.5 SP1 on Windows 10 LTSC
Build minimal QNX Image File System (IFS) on Windows 10
Checkout bsp-qnx65-qemu-virt-a15 and build on Windows 10 with QNX 6.5 SP1
C:\prj>git clone https://github.com/myQNX/bsp-qnx65-qemu-virt-a15.git
C:\prj>cd bsp-qnx65-qemu-virt-a15
C:\prj\bsp-qnx65-qemu-virt-a15>make
Build u-boot that supports virtualized Cortex-A15 machine on Ubuntu 24.04
Install dependencies
$ sudo apt update
$ sudo apt install build-essential gcc-arm-linux-gnueabihf flex bison libssl-dev device-tree-compiler qemu-system-arm libgnutls28-dev
$ git clone https://source.denx.de/u-boot/u-boot.git
$ cd u-boot
$ git checkout v2025.04
$ export CROSS_COMPILE=arm-linux-gnueabihf-
$ ${CROSS_COMPILE}gcc --version
arm-linux-gnueabihf-gcc (Ubuntu 13.3.0-6ubuntu2~24.04) 13.3.0
Copyright (C) 2023 Free Software Foundation, Inc.
This is free software; see the source for copying conditions.  There is NO
warranty; not even for MERCHANTABILITY or FITNESS FOR A PARTICULAR PURPOSE.
$ make qemu_arm_defconfig
Edit .config
u1@m1:~/u-boot$ nvim .config
CONFIG_BOOTCOMMAND="virtio scan; fatload virtio 0:1 0x40200000 bsp-qemu-virt.bin; go 0x40200000"
CONFIG_BOOTDELAY=0
u1@m1:~/u-boot$ make -j$(nproc)
u1@m1:~/u-boot$ mkdir -p ~/vmtest/images
u1@m1:~/u-boot$ cp u-boot.bin ~/vmtest/images
~/vmtest/images should have files like below -
u1@m1:~/vmtest$ ls images
bsp-qemu-virt.bin  u-boot.bin
u1@m1:~/vmtest$ qemu-system-arm -M virt -m 256 -cpu cortex-a15 -bios ./images/u-boot.bin -hda fat:rw:./images -vga none -serial mon:stdio -nographic
u1@m1:~/vmtest$ qemu-system-arm -M virt -m 256 -cpu cortex-a7 -bios ./images/u-boot.bin -hda fat:rw:./images -vga none -serial mon:stdio -nographi
c
WARNING: Image format was not specified for 'json:{"fat-type": 0, "dir": "./images", "driver": "vvfat", "floppy": false, "rw": true, "write-target": {"driver"
: "qcow", "file": {"driver": "file", "filename": "/var/tmp/vl.TH4052"}}}' and probing guessed raw.
         Automatically detecting the format is dangerous for raw images, write operations on block 0 will be restricted.
         Specify the 'raw' format explicitly to remove the restrictions.
Bloblist at 0 not found (err=-2)
alloc space exhausted ptr 400 limit 0
Bloblist at 0 not found (err=-2)


U-Boot 2025.04 (Apr 29 2025 - 12:45:47 -0500)

DRAM:  256 MiB
using memory 0x4e69b000-0x4f6db000 for malloc()
Core:  51 devices, 14 uclasses, devicetree: board
Flash: 64 MiB
Loading Environment from Flash... *** Warning - bad CRC, using default environment

In:    serial,usbkbd
Out:   serial,vidconsole
Err:   serial,vidconsole
No USB controllers found
Net:   eth0: virtio-net#32

starting USB...
No USB controllers found
Net:   eth0: virtio-net#32

starting USB...
No USB controllers found
Hit any key to stop autoboot:  0
2700652 bytes read in 4 ms (643.9 MiB/s)
## Starting application at 0x40200000 ...
CPUID=1091551349 ;
> init_intrinfo:
> init_cacheattr:
> init_cpuinfo:
CPUID=1091551349 ;
CPU0: L1 Icache: 512x64
CPU0: L1 Dcache: 512x64 WB
CPU0: L2 Dcache: 36864x64 WB
CPU0: VFP-d32 FPSID=41023075
CPU0: NEON MVFR0=10110222 MVFR1=11111111
CPU0: 410fc075: Cortex A7 rev 5 500MHz
init_hwinfo:Loading IFS...done
elf_map: 1M va=fe000000 pa=40200000 sz=00100000
elf_map: 1M va=fe000000 pa=40200000 sz=00100000
Header size=0x0000009c, Total Size=0x000005d0, #Cpu=1, Type=4
Section:system_private offset:0x000001f0 size:0x00000068
  syspage ptr user:fc404000 kernel:fc404000
  cpupage ptr user:fc404948 kernel:fc404948 spacing:84
  kdebug info:00000000 callback:00000000
  boot pgms: idx=0
    0) base paddr:40211000 start addr:fe043024
  ramsize:00000000 pagesize:00001000
Section:qtime offset:0x00000148 size:0x00000060
  boot:00000000 CPS:00000000016e3600 rate/scale:83333333/-15 intr:1
  flags:00000001 load:0 epoch:1970 rr_mul:0 adj count/inc:0/0
Section:callout offset:0x000000a0 size:0x00000048
  reboot:00000000 power:fc4047ec
  timer_load:fc40480c reload:fc404834 value:fc404850
  0) display:fc404868 poll:fc40488c break:fc4048b0
  1) display:00000000 poll:00000000 break:00000000
Section:cpuinfo offset:0x000001a8 size:0x00000020
  0) cpu:410fc075 flags:c0000076 speed:000001f4 cache i/d:0/1 name:72
Section:cacheattr offset:0x00000590 size:0x00000040
  0) flags:01 size:0040 #lines:0200 control:fc4045d8 next:255
  1) flags:22 size:0040 #lines:0200 control:fc404638 next:255
Section:meminfo offset:0x000005d0 size:0x00000000
Section:asinfo offset:0x00000330 size:0x00000220
  0000) 0000000000000000-00000000ffffffff o:ffff a:0010 p:100 c:00000000 n:21
  0020) 0000000000000000-00000000ffffffff o:0000 a:0010 p:100 c:00000000 n:28
  0040) 0000000048000000-0000000048ffffff o:0000 a:0013 p:100 c:00000000 n:36
  0060) 0000000048000000-0000000048ffffff o:0040 a:0013 p:100 c:00000000 n:44
  0080) 0000000040000000-0000000047ffffff o:0020 a:0037 p:100 c:00000000 n:47
  00a0) 0000000048000000-0000000048ffffff o:0060 a:0037 p:100 c:00000000 n:47
  00c0) 0000000049000000-000000004fffffff o:0020 a:0017 p:100 c:00000000 n:47
  00e0) 0000000000000000-00000000ffffffff o:ffff a:0010 p:100 c:00000000 n:21
  0100) 0000000040000000-0000000047ffffff o:00e0 a:0007 p:100 c:00000000 n:51
  0120) 0000000040210110-000000004049356b o:0000 a:0005 p:100 c:00000000 n:82
  0140) 0000000040200008-000000004021010f o:0000 a:0007 p:100 c:00000000 n:90
  0160) 0000000040210110-000000004049356b o:0000 a:0007 p:100 c:00000000 n:98
  0180) 0000000040000000-0000000040007fff o:0080 a:0007 p:100 c:00000000 n:106
  01a0) 000000004001099c-0000000040200007 o:0080 a:0007 p:100 c:00000000 n:106
  01c0) 000000004049356c-0000000047ffffff o:0080 a:0027 p:100 c:00000000 n:106
  01e0) 0000000048000000-0000000048ffffff o:00a0 a:0027 p:100 c:00000000 n:106
  0200) 0000000049000000-000000004fffffff o:00c0 a:0007 p:100 c:00000000 n:106
Section:hwinfo offset:0x000002e8 size:0x00000048
  0) size:3 tag:3(Group) isize:3, iname:0(hw), owner:65535, kids:1
  12) size:3 tag:17(Bus) isize:3, iname:9(unknown), owner:0, kids:1
  24) size:3 tag:3(Group) isize:3, iname:56(rtc), owner:12, kids:1
  36) size:4 tag:65(Device) isize:4, iname:60(NONE), owner:24, kids:0
     00 00 00 00
Section:typed_strings offset:0x00000258 size:0x00000018
  off:0 type:2 string:'localhost'
Section:strings offset:0x00000270 size:0x00000078
  [0]'hw' [3]'Group' [9]'unknown' [17]'Bus' [21]'memory' [28]'below4G'
  [36]'L4-Ctrl' [44]'io' [47]'ram' [51]'1to1' [56]'rtc' [60]'NONE' [65]'Device'
  [72]'Cortex A7' [82]'imagefs' [90]'startup' [98]'bootram' [106]'sysram'
Section:intrinfo offset:0x00000550 size:0x00000040
  0) vector_base:00000000, #vectors:160, cascade_vector:7fffffff
     cpu_intr_base:00000000, cpu_intr_stride:0, flags:0000
      id => flags:8000, size:005c, rtn:fc4046dc
     eoi => flags:9000, size:003c, rtn:fc404738
     mask:fc404774, unmask:fc4047a8, config:fc4047dc
Section:smp offset:0x000005d0 size:0x00000000
Section:pminfo offset:0x000005d0 size:0x00000000
Section:mdriver offset:0x000005d0 size:0x00000000
Section:boxinfo offset:0x000001c8 size:0x00000028
  hw_flags:00000000
Section:cpu offset:0x00000128 size:0x00000020
  page_flush:fc404688 page_flush_deferred:fc4046d8
  upte_ro:00000e6e upte_rw:00000c7e
  kpte_ro:0000065e kpte_rw:0000045e
  mask_nc:000001cc
  mmu_cr1:00c51870 set:00803c7f clr:00000000 -> 00c53c7f

System page at phys:40010000 user:fc404000 kern:fc404000
Starting next program at vfe043024
cpu_startnext: cpu0 -> fe043024
vstart: 1075845408
flags:1VFPv3: fpsid=41023075
coproc_attach(10): replacing fe05a8b4 with fe06826c
coproc_attach(11): replacing fe05a8b4 with fe06826c
Welcome to QNX Neutrino 6.5.0 on the QEMU ARMv7 virt
Serial opened...
#
Sunday, April 20, 2025
How to configure ftp server on QNX 7.1 with PAM user authentication
How to configure ftp server on QNX 7.1 with PAM user authentication
Create empty folder, I am using vm12C:\> cd \ C:\> mkdir vms C:\> cd vms C:\vms> mkdir vm12 C:\vms> cd vm12
C:\vms\vm12>C:\qnx710\host\win64\x86_64\usr\bin\bash C:/qnx710/host/common/bin/mkqnximage --noprompt --hostname=vm12 --type=vbox --arch=x86_64 --build
C:\vms\vm12>nvim C:\vms\vm12\local\snippets\system_files.custom
C:\vms\vm12>C:\qnx710\host\win64\x86_64\usr\bin\bash C:/qnx710/host/common/bin/mkqnximage --noprompt --hostname=vm12 --type=vbox --arch=x86_64 --build --force --run
Saturday, April 19, 2025
Got "Makefile:8: recurse.mk: No such file or directory" building a project after applying QNX 6.5 SP1
Got "Makefile:8: recurse.mk: No such file or directory" building a project after applying QNX 6.5 SP1
I applied QNX 6.5 SP1 to an existing QNX 6.5 on Raspberry Pi OS (2022-07-01-raspios-bullseye-i386) but I am getting error below when building./opt/qnx650/host/linux/x86/usr/bin/make -k CPULIST=x86 all --file=/tmp/QMakefile174511465999353758.tmp Makefile:8: recurse.mk: No such file or directory make: *** No rule to make target `recurse.mk'. make: Failed to remake makefile `recurse.mk'. make: *** No rule to make target `all'.
$ sudo -E ./qnxsdp-6.5.0SP1-201206271006-linux.bin
Got "Permission denied" running a binary from CD-ROM
Got "Permission denied" running a binary from CD-ROM
I was trying to install QNX SDP 6.5 from a CD-ROM, like below:$ sudo ./qnxsdp-6.5.0-201007091524-linux.bin
sudo: unable to execute ./qnxsdp-6.5.0-201007091524-linux.bin: Permission denied
$ sudo mount -o remount,ro,exec /media/cdrom0
Friday, April 18, 2025
Rust on QNX
Rust on QNX
This blog shows how to build a Rust toolchain for QNX 7.1 OS.Below is my environment:
Host OS: Linux Mint 22.1
QNX: 7.1
To get started, let's get lastest Rust so we can use it to bootstrap the new toolchain
$ curl --proto '=https' --tlsv1.2 -sSf https://sh.rustup.rs | sh
$ sudo apt install build-essential cmake python3 perl git llvm-dev
$ source ~/qnx710/qnxsdp-env.sh
$ mkdir ~/repo
$ cd ~/repo
$ git clone https://github.com/rust-lang/rust.git
$ cd rust
$ #create config.toml
$ echo 'profile = "compiler"' > config.toml
$ echo change-id = 999999 >> config.toml
$ export build_env='
    CC_x86_64_unknown_nto_qnx710=qcc
    CFLAGS_x86_64_unknown_nto_qnx710=-Vgcc_ntox86_64_cxx
    CXX_x86_64_unknown_nto_qnx710=qcc
    AR_x86_64_unknown_nto_qnx710=ntox86_64-ar
    '
$ env $build_env \
    ./x.py build \
        --target x86_64-unknown-linux-gnu,x86_64-pc-nto-qnx710 \
        rustc library/core library/alloc library/std
$ rustup toolchain link qnx-toolchain ~/repo/rust/build/x86_64-unknown-linux-gnu/stage1/
$ rustup default qnx-toolchain
$ ls ~/prj/hello-world/target/x86_64-pc-nto-qnx710/debug/hello-word
Thursday, March 27, 2025
How to configure nfs server on QNX 7.1
How to configure nfs server on QNX 7.1
Target: QNX 7.1 running on a VM (VMware Workstation or VirtualBox). It is assummed that the targets are newly creaed VMs. Server target VM has an IP of 192.168.1.2, the client target has the IP of 192.168.1.3Copy nfsd and portmap to the server target in /system/xbin, like:
C:\>ntox86_64-gdb.exe -ex "target qnx 192.168.1.2:8000" -ex "upload C:\qnx710\target\qnx7\x86_64\usr\sbin\nfsd /system/xbin/nfsd" -ex "quit"
C:\>ntox86_64-gdb.exe -ex "target qnx 192.168.1.2:8000" -ex "upload C:\qnx710\target\qnx7\x86_64\usr\bin\portmap /system/xbin/portmap" -ex "quit"
udp tpi_clts v inet udp - -
tcp tpi_cots_ord v inet tcp - -
udp6 tpi_clts v inet6 udp - -
tcp6 tpi_cots_ord v inet6 tcp - -
rawip tpi_raw - inet - - -
local tpi_cots_ord - loopback - - -
unix tpi_cots_ord - loopback - - -
# mkdir /data/export
/data/export -root=0 192.168.1.3
# mkdir /var/run
# portmap
# pidin -faA | grep portmap
# nfsd
# pidin -faA | grep nfsd
C:\>ntox86_64-gdb.exe -ex "target qnx 192.168.1.3:8000" -ex "upload C:\qnx710\target\qnx7\x86_64\usr\sbin\fs-nfs3 /system/xbin/fs-nfs3" -ex "quit"
# fs-nfs3 192.168.1.2:/data/exports /data2
# echo "Hello world" >> /data2/hello.txt
# cat /data2/hello.txt
Wednesday, March 26, 2025
QNX 7.1 error booting up a VM - "ldd:FATAL: Failed to load lazyload dependency. Unresolved symbol: _ITM_registerTMCloneTable"
QNX 7.1 error booting up a VM - "ldd:FATAL: Failed to load lazyload dependency. Unresolved symbol: _ITM_registerTMCloneTable"
I recently created a QNX 7.1 VM target on Windows 10 (verified on both VMware Workstation Pro 14.1.8 and VirtualBox 7.1.6) but it would not properly boot up. The console shows ldd:FATAL: Failed to load lazyload dependency. Unresolved symbol: _ITM_registerTMCloneTable
# local/snippets/system_files.custom
# Placeholder for local list of files to add to system partition
lib/libpci.so.2.3=lib/libpci.so.2.3
lib/libpci.so.3.0=lib/libpci.so.3.0
C:\Users\username\ide-7.1-workspace\vm10>C:\qnx710\host\win64\x86_64\usr\bin\bash C:/qnx710/host/common/bin/mkqnximage --build --run
Where:
- You have to be in the directory where the VM files are located, in my case it is in C:\Users\yh\ide-7.1-workspace\vm10
- Do a build and then run the vm
Sunday, September 01, 2024
Installing QNX 6.4.1 on Ubuntu 20.04
Installing QNX 6.4.1 on Ubuntu 20.04
Install pre-requisites$: sudo dpkg --add-architecture i386 $: sudo apt update $: sudo apt install libc6:i386 default-jre-headless:i386 libgtk2.0-0:i386 libcanberra-gtk-module:i386 gtk2-engines-murrine:i386 libatk-adaptor:i386 gtk2-engines-pixbuf:i386 gtk2-engines:i386 libasound2-plugins:i386 libxtst6:i386
$: sudo ./qnxsdp-6.4.1-200905201802-linux.bin -silent
$: qde
How to fix "java.lang.UnsatisfiedLinkError: no swt-pi-gtk-3452 or swt-pi-gtk in swt.library.path, java.library.path or the jar file"
How to fix "java.lang.UnsatisfiedLinkError: no swt-pi-gtk-3452 or swt-pi-gtk in swt.library.path, java.library.path or the jar file"
Running a 32-bit Eclipse-based application on Ubuntu 20.04 64-bit may fail with message like below:!SESSION 2024-09-01 04:49:52.176 ----------------------------------------------- eclipse.buildId=I20090510 java.version=1.5.0_11 java.vendor=Sun Microsystems Inc. BootLoader constants: OS=linux, ARCH=x86, WS=gtk, NL=en_US Command-line arguments: -os linux -ws gtk -arch x86 !ENTRY org.eclipse.osgi 4 0 2024-09-01 04:49:56.569 !MESSAGE Application error !STACK 1 java.lang.UnsatisfiedLinkError: no swt-pi-gtk-3452 or swt-pi-gtk in swt.library.path, java.library.path or the jar file at org.eclipse.swt.internal.Library.loadLibrary(Library.java:233) at org.eclipse.swt.internal.Library.loadLibrary(Library.java:151) at org.eclipse.swt.internal.gtk.OS.(OS.java:22) at org.eclipse.swt.internal.Converter.wcsToMbcs(Converter.java:63) at org.eclipse.swt.internal.Converter.wcsToMbcs(Converter.java:54) at org.eclipse.swt.widgets.Display. (Display.java:130) at org.eclipse.ui.internal.Workbench.createDisplay(Workbench.java:511) at org.eclipse.ui.PlatformUI.createDisplay(PlatformUI.java:161) at org.eclipse.ui.internal.ide.application.IDEApplication.createDisplay(IDEApplication.java:143) at org.eclipse.ui.internal.ide.application.IDEApplication.start(IDEApplication.java:88) at org.eclipse.equinox.internal.app.EclipseAppHandle.run(EclipseAppHandle.java:193) at org.eclipse.core.runtime.internal.adaptor.EclipseAppLauncher.runApplication(EclipseAppLauncher.java:110) at org.eclipse.core.runtime.internal.adaptor.EclipseAppLauncher.start(EclipseAppLauncher.java:79) at org.eclipse.core.runtime.adaptor.EclipseStarter.run(EclipseStarter.java:386) at org.eclipse.core.runtime.adaptor.EclipseStarter.run(EclipseStarter.java:179) at sun.reflect.NativeMethodAccessorImpl.invoke0(Native Method) at sun.reflect.NativeMethodAccessorImpl.invoke(Unknown Source) at sun.reflect.DelegatingMethodAccessorImpl.invoke(Unknown Source) at java.lang.reflect.Method.invoke(Unknown Source) at org.eclipse.equinox.launcher.Main.invokeFramework(Main.java:549) at org.eclipse.equinox.launcher.Main.basicRun(Main.java:504) at org.eclipse.equinox.launcher.Main.run(Main.java:1236) !ENTRY org.eclipse.osgi 2 0 2024-09-01 04:49:56.596 !MESSAGE The following is a complete list of bundles which are not resolved, see the prior log entry for the root cause if it exists: !SUBENTRY 1 org.eclipse.osgi 2 0 2024-09-01 04:49:56.597 !MESSAGE Bundle update@plugins/com.qnx.tools.ide.phab.ui_4.6.0.v200903271252.jar [111] was not resolved. !SUBENTRY 2 com.qnx.tools.ide.phab.ui 2 0 2024-09-01 04:49:56.597 !MESSAGE Missing required bundle com.qnx.tools.ide.phab.core_0.0.0. !SUBENTRY 1 org.eclipse.osgi 2 0 2024-09-01 04:49:56.597 !MESSAGE Bundle update@plugins/com.qnx.tools.ide.phab.core_4.6.0.v200903271252.jar [126] was not resolved. !SUBENTRY 2 com.qnx.tools.ide.phab.core 2 0 2024-09-01 04:49:56.597 !MESSAGE Platform filter did not match: (| (osgi.ws=win32) (osgi.ws=photon))
$: sudo apt-get install libxtst6:i386
Installing QNX 6.5 on Hyper-V 2022
Installing QNX 6.5 on Hyper-V 2022
Create a VM in Hyper-V
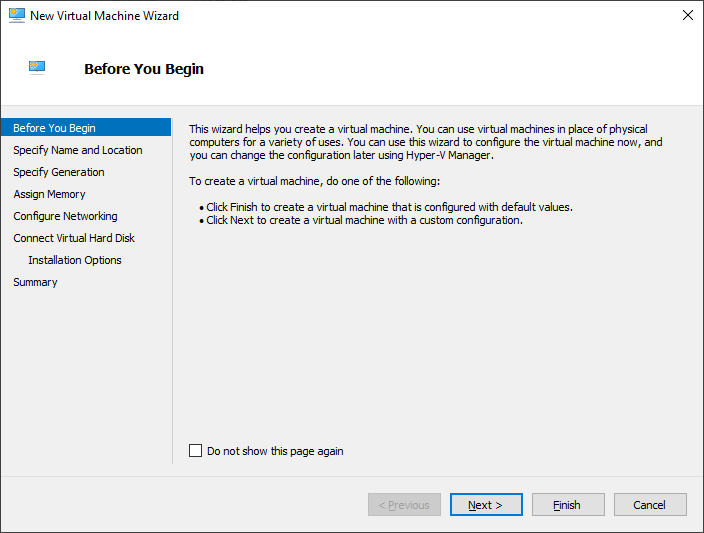


Remove all NICs and add a legacy network adapater

Power up and install QNX 6.5
This assumes that the ISO was already mounted. It is important that DMA is disabled by pressing d and then press ENTER key.


Tuesday, February 06, 2024
How to get CPU and memory info in QNX
How to get CPU and memory info in QNX
To get CPU information in QNX, run pidin infoSammple out below:
# pidin info
CPU:X86 Release:6.5.0  FreeMem:846Mb/1023Mb BootTime:Apr 05 01:03:42 UTC 2023
Processes: 33, Threads: 91
Processor1: 131758 Intel 686 F6M1SS7 1999MHz FPU
Wednesday, October 25, 2023
Enable SSH server on QNX 6.5
This is quick start guide how to run ssh server on QNX. Tested on QNX 6.5
(650SP1-VM.tar).
This is not security best practice but this is only a test machine. Enable direct root ssh login to the machine.
To start ssh service interactively, do:
Use /usr/sbin/sshd -ddd to view debug output
To run sshd on start, add the following to /etc/rc.d/rc.local:
Reference:
http://www.qnx.com/developers/docs/660/index.jsp?topic=%2Fcom.qnx.doc.neutrino.utilities%2Ftopic%2Fs%2Fsshd.html
# ssh-keygen -t dsa -b 1024 -f /etc/ssh/ssh_host_dsa_key -N ''
# ssh-keygen -t rsa -b 1024 -f /etc/ssh/ssh_host_rsa_key -N ''
This is not security best practice but this is only a test machine. Enable direct root ssh login to the machine.
# sed -i 's/#PermitRootLogin no/PermitRootLogin yes/g' /etc/ssh/sshd_config
To start ssh service interactively, do:
# /usr/sbin/sshd
Use /usr/sbin/sshd -ddd to view debug output
To run sshd on start, add the following to /etc/rc.d/rc.local:
/usr/sbin/sshd &
http://www.qnx.com/developers/docs/660/index.jsp?topic=%2Fcom.qnx.doc.neutrino.utilities%2Ftopic%2Fs%2Fsshd.html
Using INTEL PRO/1000 Gigabit driver in QNX 6.6 running on VMware ESXi
Using INTEL PRO/1000 Gigabit driver in QNX 6.6 running on VMware ESXi
When installing QNX 6.6 using VM-QNXSDP660-201402230339.iso on VMware ESXi (8.0 update 2) the default network apapter used is AMD Lance PCNet 32. The PCNet 32 driver reports to only support 10Mbps, for cases where higher network bandwidth is needed Intel PRO/1000 Gigabit is a good choice. To load Intel PRO/1000 Gigabit, edit /etc/rc.d/startup_aps.sh and comment out pcnet.so driver and add dirver for e1000, like:#io-pkt-v4-hc -d /lib/dll/devn-pcnet.so & io-pkt-v4-hc -d /lib/dll/devnp-e1000.so &
Saturday, October 14, 2023
Installing Vim 7.2 in QNX 6.5 using pkgsrc
Installing Vim 7.2 in QNX 6.5 using pkgsrc
QNX 6.5 self-hosted Neutrino host ships with vi but Vim 7.2 is a big imporovement over the default application. Below are the steps to install Vim 7.2 using pkgsrc.-
Download the bootstrap package
http://archive.netbsd.org/pub/pkgsrc-archive/packages/QNX/i386/6.5.0_head_20110826/bootstrap.tar.gz -
Download Vim package and dependencies from the link below
http://archive.netbsd.org/pub/pkgsrc-archive/packages/QNX/i386/6.5.0_head_20110826/Allvim-share-7.2.446.tgz libiconv-1.14.tgz gettext-lib-0.18.1.1.tgz vim-7.2.446nb1.tgz -
Copy the files into /tmp using ftp, Momentics IDE, sftp, etc
#: ls /tmp
bootstrap.tar.gz
vim-share-7.2.446.tgz
libiconv-1.14.tgz
gettext-lib-0.18.1.1.tgz
vim-7.2.446nb1.tgz
-
Install bootstrap package into the root folder
#: tar -xvzf bootstrap.tar.gz -C /
-
Add pkgsrc utilities into the path
#: echo 'export PATH=${PATH}:/usr/pkg/bin:/usr/pkg/sbin' >> ~/.profile -
Modify /etc/rc.d/rc.local to update CS_LIBPATH system variable
setconf CS_LIBPATH $(getconf CS_LIBPATH):/usr/pkg/lib
- Logout and then log back in
-
Install dependencies and Vim
#: pkg_add -v /tmp/libiconv-1.14.tgz
#: pkg_add -v /tmp/gettext-lib-0.18.1.1.tgz
#: pkg_add -v /tmp/vim-share-7.2.446.tgz
#: pkg_add -v /tmp/vim-7.2.446nb1.tgz
-
Fix backspace not deleting the character by adding the following to ~/.vimrc
set backspace=indent,eol,start
-
Run Vim!
#: export TERM=ansi
#: vim
https://community.qnx.com/sf/wiki/do/viewPage/projects.pkgsrc/wiki/BinaryPackages
How to apply QNX 6.5 SP1 into an existing QNX self hosted installation
How to apply QNX 6.5 SP1 into an existing QNX self hosted installation
This was tested on VirtualBox with QNX 6.5.0 self-hosted Neutrino host.Below are the quick steps
- Mount the QNX 6.5 SP1 iso (qnxsdp-6.5.0SP1.iso)
-
Run the following command in QNX terminal
Load CD/DVD-ROM driverMount the cd/dvd-romdevb-eide cdrom
Install the updatemount -t cd /dev/cd0 /cd
cd /cd
sh ./qnxsdp-6.5.0SP1-201206270843-nto.sh
Building in QNX Momentics 6.5 SP1 throws "Couldn't reserve space for cygwin's heap, Win32 error 0"
Building in QNX Momentics 6.5 SP1 throws "Couldn't reserve space for cygwin's heap, Win32 error 0"
Buiding barebones QNX C++ program throws "Couldn't reserve space for cygwin's heap, Win32 error 0". See sample output below
C:\QNX650\host\win32\x86\usr\bin\make.exe -k CPULIST=x86 all --file=C:/Users/u1/AppData/Local/Temp/QMakefile169726255947317724.tmp
      0 [main] us 0 init_cheap: VirtualAlloc pointer is null, Win32 error 487
AllocationBase 0x0, BaseAddress 0x71690000, RegionSize 0x330000, State 0x10000
C:\QNX650\host\win32\x86\usr\bin\sh.exe: *** Couldn't reserve space for cygwin's heap, Win32 error 0
C:/QNX650/host/win32/x86/usr/bin/make.exe -j 1 -Cx86 -fMakefile all
make.exe[1]: Entering directory `C:/ide-4.7-workspace/test1/x86'
C:/QNX650/host/win32/x86/usr/bin/make.exe -j 1 -Co -fMakefile all
make.exe[2]: Entering directory `C:/ide-4.7-workspace/test1/x86/o'
make.exe[2]: Nothing to be done for `all'.
make.exe[2]: Leaving directory `C:/ide-4.7-workspace/test1/x86/o'
C:/QNX650/host/win32/x86/usr/bin/make.exe -j 1 -Co-g -fMakefile all
make.exe[2]: Entering directory `C:/ide-4.7-workspace/test1/x86/o-g'
make.exe[2]: Nothing to be done for `all'.
make.exe[2]: Leaving directory `C:/ide-4.7-workspace/test1/x86/o-g'
make.exe[1]: Leaving directory `C:/ide-4.7-workspace/test1/x86'
It seems like "C:\QNX650\host\win32\x86\usr\bin\msys-1.0.dll" needs to be loaded
at specific address, to fix do the following:
- Install 32-bit version of Git for Windows - it ships with rebase.exe
-
Then run the following commands:
Create a backup, just incase we need to revert back.cp "C:\QNX650\host\win32\x86\usr\bin\msys-1.0.dll" "C:\QNX650\host\win32\x86\usr\bin\msys-1.0.dll.bak"
Change directory to the rebase.exe executablecd "C:\Program Files (x86)\Git\bin"
Perform rebaserebase.exe -b 0x50000000 C:\QNX650\host\win32\x86\usr\bin\msys-1.0.dll
Refs:
https://www.qnx.com/support/knowledgebase.html?id=5011O000001OLXD
Saturday, October 08, 2022
Running gles1-gears on QNX 6.6 VMware VM
Running gles1-gears on QNX 6.6 VMware VM
# telnetd -debug &
# export GRAPHICS_ROOT=/usr/lib/graphics/vmware
# screen
# export GRAPHICS_ROOT=/usr/lib/graphics/vmware
# /usr/bin/gles1-gears
Subscribe to:
Posts (Atom)
-
 Installing MonoDevelop in OpenSUSE 12.2 from its repository was very easy. When running it for the first time though I got the message: Th...
 -
Tried to update my Ubuntu host today and it did pickup that new version of VirtualBox is available (4.1.8). All other packages installed pro...
-
Install Winget on Windows 2022 or Windows 10 LTSC Install Pre-reqs Install Microsoft.UI.Xaml/2.8.6 Navigate to https://www.nuget.org/pa...